Goalkeeper positioning: narrowing the angle and where to stand
Where the goalkeeper stands often matters more than the save: the ball-to-goal-centre line, narrowing the angle, the DFB zone model and common mistakes.
Where should the goalkeeper stand?
The goalkeeper stands on the imaginary line between the ball and the centre of the goal. When the ball moves, the keeper shifts with it so that they are always exactly between the ball and the middle of the goal. How far off the line they stand depends on where the ball is and what can happen next.
The old principle of “the main thing is that the near post is covered” is considered outdated in modern goalkeeping. Instead, the German FA (DFB) describes the “virtual goal”: the keeper only has to cover the area the shooter can actually see. And that area gets smaller the further the keeper stands in front of the goal.
Narrowing the angle: what does it achieve?
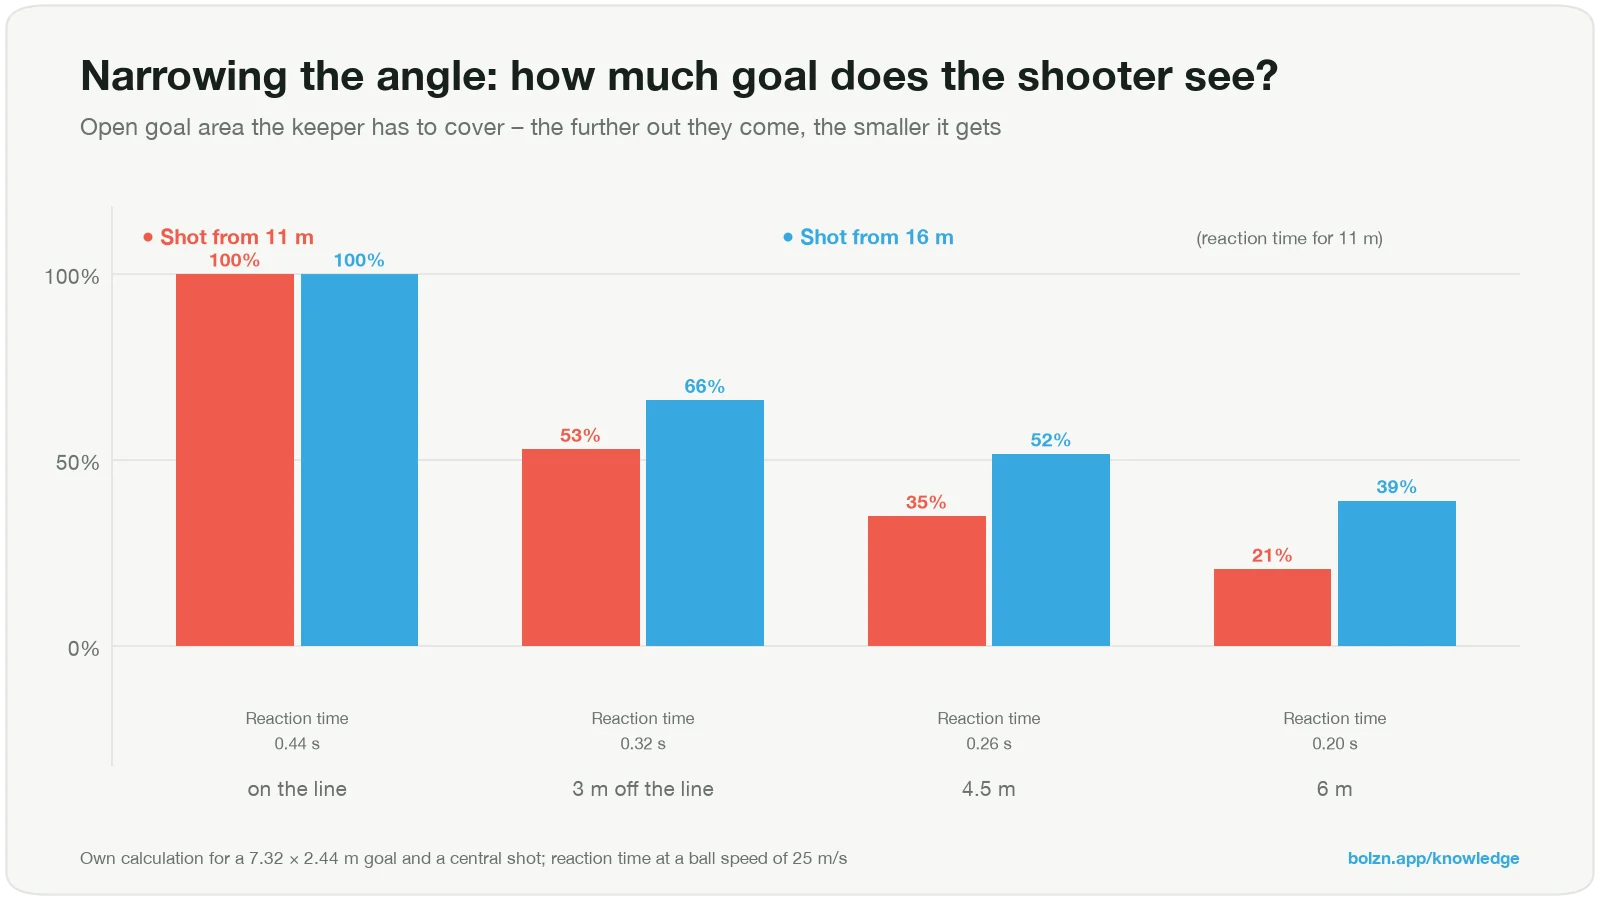
The calculation shows the trade-off:
- If the keeper comes out, the area they have to cover shrinks considerably. Just 3 metres in front of the goal, for a shot from 11 metres, it is only a little over half.
- At the same time, there is less time. Against a hard shot the keeper has a good 0.4 seconds on the line, but only 0.2 seconds 6 metres in front of the goal. And space opens up behind the keeper for a chip.
Good positioning therefore means: as far out as necessary, not as far out as possible.
The DFB zone model
The DFB divides the penalty area into three zones, based on the lines of the six-yard box and the penalty area:
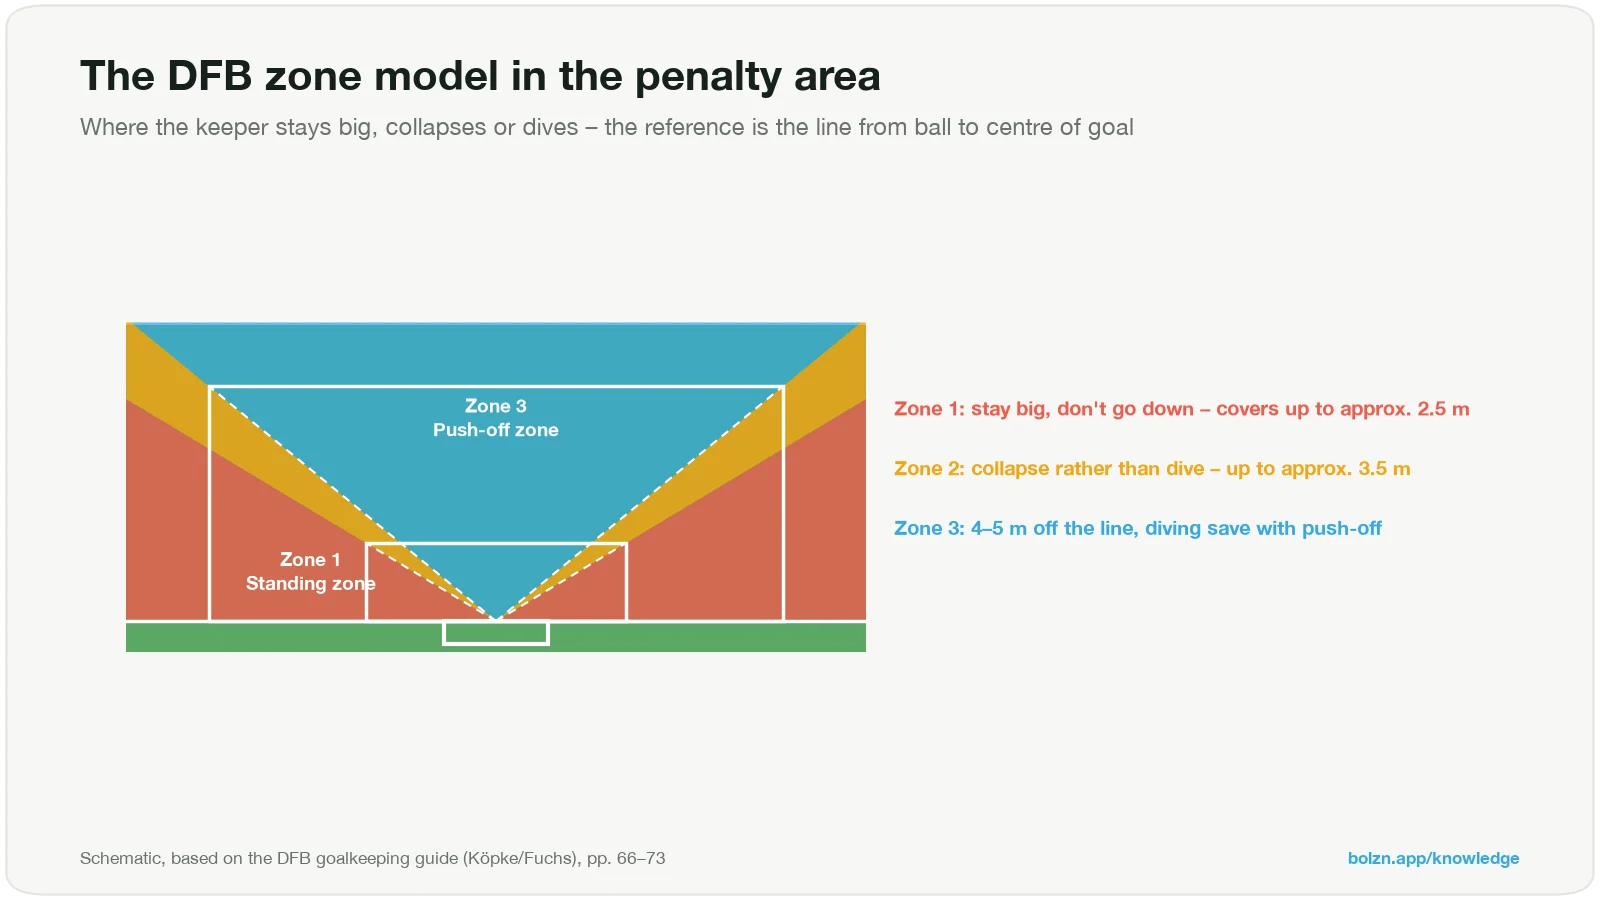
- Zone 1 – standing zone (tight angle): the ball comes from the side, close to the goal line. Only about 2.5 metres need covering. The keeper stands just in front of the near post, stays big and does not have to go to ground. One step to the side covers the goal. Do not let yourself be drawn too far out.
- Zone 2 – support and collapse zone: about 3.5 metres to cover. The keeper stands a few metres off the line and uses a collapse dive instead of a long full dive.
- Zone 3 – push-off zone (central): the keeper moves 4 to 5 metres in front of the goal. This is where the full dive with a push-off is needed.
According to the DFB, the model can be taught from about U13 and also applies to youth goals. In training you start with zone 1, because that is where the least can go wrong.
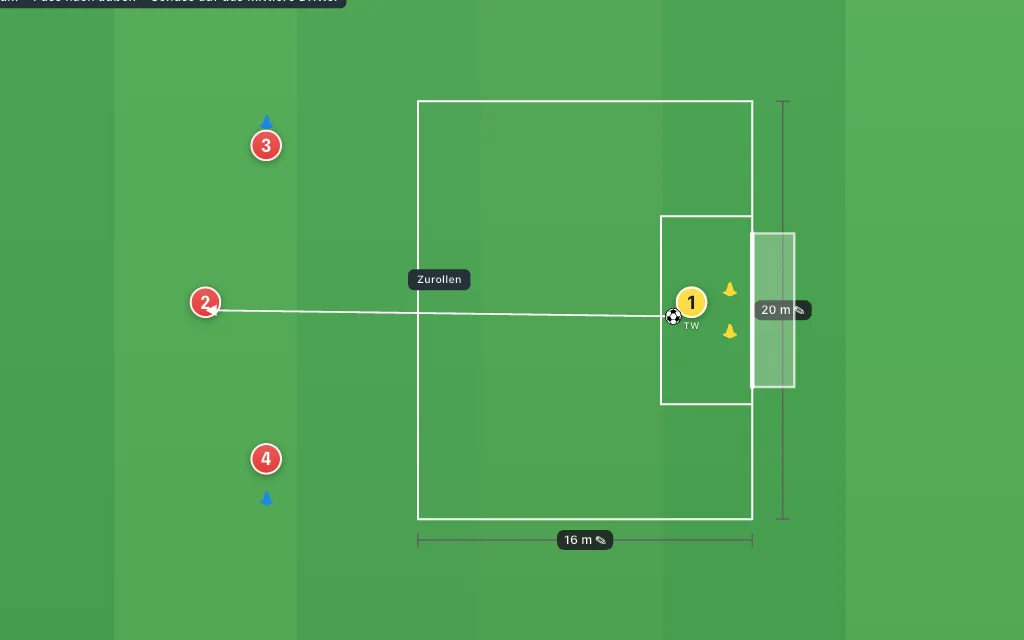
From the bolzn drill library: goalkeeper facing shots from inside right and inside left – get between the ball and the centre of the goal.
Positioning when the opposition has the ball
When the ball is a long way off, in midfield for example, the keeper moves further out. Two things determine how far:
- The keeper must not be caught out by a long-range shot. A keeper who stands too far forward gets chipped.
- There must be no room for a ball between the back line and the keeper. A through ball in behind the defence belongs to the keeper if they get there in time.
This makes the goalkeeper the last player behind the defence. They have to read the game and organise the defence.
Common positioning mistakes
- Glued to the line: the shooter sees the whole goal.
- Too far out against shots from distance: chips and high balls go over the keeper.
- Not shifting across: the ball moves, the keeper stays put. Take small, quick adjusting steps.
- Lining up with the post instead of the centre of the goal.
- Still moving when the shot is taken: the keeper must be in the set position when the ball is struck.
How to train positioning
- “Magic string”: stretch a string from both posts to the ball. The keeper sees the area they have to cover.
- Changing shooting position: several shooters spread around the penalty area, the coach signals who shoots. The keeper shifts across and is set for the shot.
- Line of cones in front of the goal: the keeper comes out as far as the line of cones, then the shot follows.
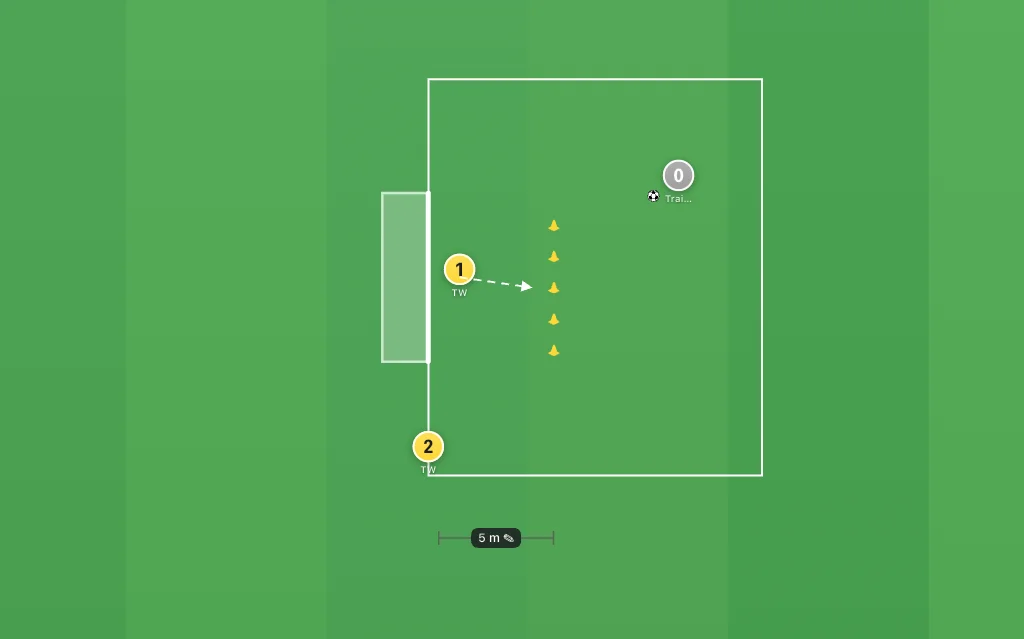
From the bolzn drill library: narrowing the angle – out of the goal as far as the line of cones, then a save with the hands or a foot save.
How the keeper comes out when an attacker is running at them alone is covered in the article Goalkeeper 1v1.
Sources
- DFB (n.d., c. 2016). Leitfaden Torwartspiel (youth national teams, Köpke/Fuchs), pp. 66–73 and 112.
- U15 goalkeeper session of the Spanish national team (bolzn drill library).
- Masters, R. S. W., van der Kamp, J. & Jackson, R. C. (2007). Imperceptibly off-center goalkeepers influence penalty-kick direction in soccer. Psychological Science.
- Own calculation of the goal area to be covered (goal 7.32 × 2.44 m, central shot).